The Gardener's Blueprint: How to Grow a Bushy, Productive
Moringa Tree
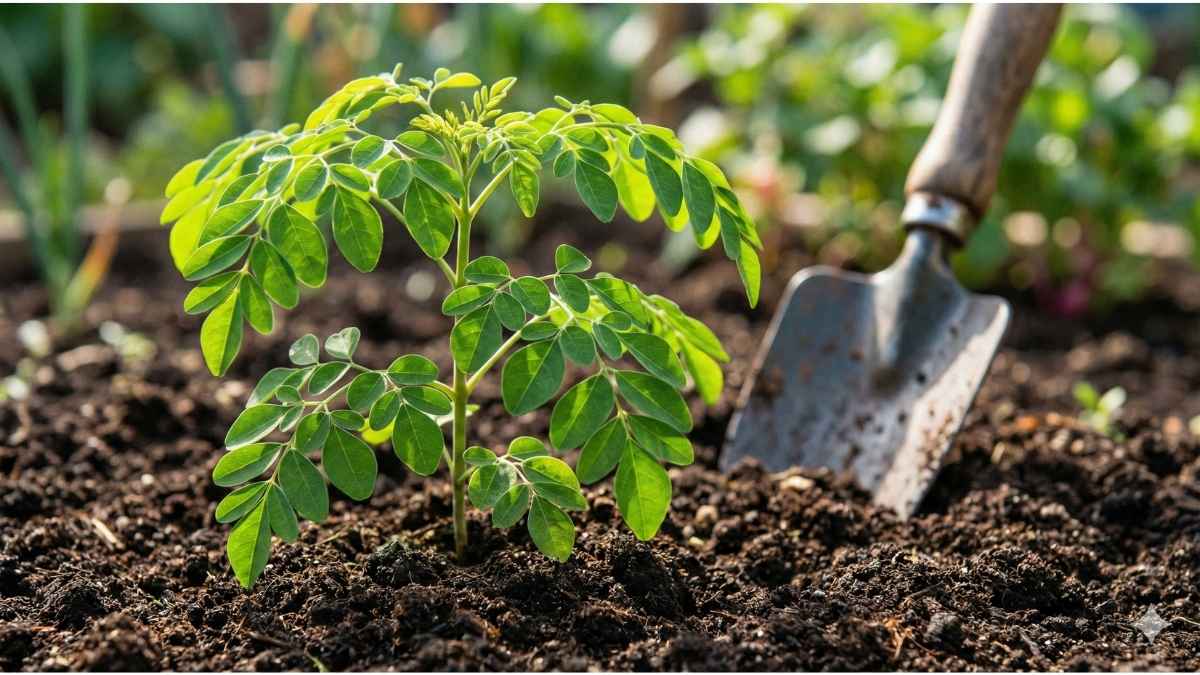
So, you're ready to plant a moringa tree. You've read the incredible stories, and you're excited to bring this powerhouse plant into your garden. But let me share something I've learned from both my agricultural studies and my own hands-on experience. There's a massive difference between planting a moringa and actually harvesting from it.
The internet is filled with pictures of sad, lanky trees with a few leaves at the top, completely out of reach. That's the number one pitfall.
Home Gardeners treat it like any other tree and end up with a useless pole. This guide is my promise to you that this won't happen. I'll give you the exact, field-tested blueprint I use myself to cultivate a short, dense, and incredibly productive moringa bush, ensuring your harvest is always proper where you want it—within arm's reach.
Essential Guide to a Bushy Moringa Harvest
- ☀️ Sunlight & Drainage are Non-Negotiable: Moringa demands 6–8 hours of full direct sun and must have well-draining soil. Tuberous roots will rot quickly in waterlogged clay.
- ✂️ Aggressive Pruning Creates Yield: Avoid the "useless pole" look. Top the sapling at 3 feet to force lateral branching, creating a dense, reachable bush.
- ❄️ Know Your Zone: In zones 9–11, plant in-ground. In zone 8 and below, you must use containers and bring the tree indoors before the first frost.
- 🌿 Shade-Dry for Nutrition: Never dry leaves in direct sunlight. UV radiation degrades Vitamin A and C; use a shaded, ventilated area to preserve potency.
So, What is a Moringa Tree, Really?
So, What is a Moringa Tree, Really?
Before we get our hands dirty, let's quickly cover the basics from a gardener's perspective. The moringa tree (Moringa oleifera) is a fast-growing, deciduous tree native to the sub-Himalayan regions of India and Pakistan. Think of it as nature’s ultimate multi-tasker.
It’s incredibly resilient, tolerating poor soil and drought once established, which is why it’s a lifeline in many arid parts of the world. For us home gardeners, its true magic lies in its generosity—nearly every part of the plant is edible and packed with nutrients, and it grows so fast you can begin harvesting within months, not years.
Creating the Perfect Home: Site & Soil Preparation 🌱
 Why Drainage Matters: Moringa roots are tuberous and will rot in standing water. Use sandy or loamy soil mixes.
I’ve learned from both my studies and my own garden trials that getting the foundation right is 90% of the battle. Moringa is forgiving, but it has a few non-negotiables.
- Sunlight is Everything: Your moringa needs full, direct sun. We’re talking a minimum of six to eight hours a day. A spot that gets baked in the sun is perfect. Insufficient light will lead to a weak, leggy tree with sparse leaves.
- The #1 Rule: Excellent Drainage: This is the most critical factor. Moringa trees have tuberous roots that are highly susceptible to rot if they sit in waterlogged soil. The ideal soil is light, sandy, or loamy. If you have heavy clay soil like I do, don't worry! You just need to amend it. Dig a much larger hole than you think you need—about 3 feet wide and deep—and backfill it with a mix of your native soil, sand, and a generous amount of compost to improve its structure and drainage.
Climate Considerations: A Tale of Two Gardens
From my research and hands-on experience, I can tell you that understanding your climate is the single most important decision you'll make for your moringa tree. This plant is a true native of the tropics and subtropics, meaning it absolutely thrives in heat and sun. Its ideal temperature range is a balmy 21–35°C (70–95°F), and it's so resilient it can even tolerate short bursts of heat up to 48°C (118°F). However, it has one critical weakness: it absolutely cannot tolerate a hard frost. This single fact is the deciding factor that splits gardeners into two distinct camps.
Warm Climates (USDA Zones 9-11): If you live in a place where frost is a rare event, you've hit the jackpot. You can plant your moringa directly in the ground to live as a perennial tree year-round. In the warmest zones (10 and 11), it will flourish. In a borderline zone like 9b, a light frost might cause it to die back, but if the roots are well-mulched, it will often re-sprout vigorously in the spring. This in-ground method is ideal as it allows the tree to develop its deep, stabilizing taproot, making it incredibly drought-tolerant once established.
Think of it as a tropical houseguest for the winter. Once temperatures consistently drop below 20°C (68°F), it's time to bring it inside. Indoors, it will go dormant, lose its leaves just like a maple tree in autumn, and require very little water until spring returns. This is perfectly normal and not a sign that your tree is dying!
Two Paths to a New Tree: Planting Your Moringa
You have two excellent options for starting your tree. The best choice often depends on your climate. If you're looking for a moringa tree for sale, you'll often find them as young saplings, but starting from scratch is incredibly rewarding.
Method 1: Growing from Seed (The Taproot Advantage)
Starting from seed gives you a tree with a deep, strong taproot, which is a huge advantage for in-ground trees in hot, dry climates, as it makes them incredibly drought-resistant.
1. Get Good Seeds: Fresh seeds are key. Purchase them from a reputable online supplier for the best germination rates.
2. Pre-Sprout for Success: This is my preferred method. Soak the seeds in water for 24 hours. Then, place them between damp paper towels inside a plastic bag and store them in a warm, dark cabinet. Check them every couple of days. In about 5-14 days, you’ll see a root and stem emerge.
3. Plant with Care: Gently plant the sprouted seed about ¾ inch deep, making sure the root is pointing down and the leafy shoot is pointing up. Keep the soil consistently moist but never soggy.
Method 2: Propagating from Cuttings (The Head Start)
This method is faster and clones a mature tree. It’s a great option if you have access to an existing tree, especially for container growing, where a deep taproot isn't as critical.
1. Take a Cutting: Select a healthy, woody branch at least 1 inch in diameter. For planting directly in the ground, a large cutting of 3 feet is best. For pots, a smaller 1-foot cutting works well.
2. Dry and Plant: Let the cutting dry in a shady spot for three days to allow the cut end to callus over, which helps prevent rot. Then, plant it deep enough so that at least one-third of its length is buried in your well-draining soil mix.
3. Water and Wait: Water it well and keep the soil moist. You should see new leafy growth within a few weeks, which is a thrilling moment! 💪
A Complete Care Regimen for a Thriving Tree
Once established, your moringa will be surprisingly low-maintenance. Here’s how to keep it happy.
- Watering Wisely: Young trees need regular moisture to get established.5 For mature, in-ground trees, the biggest mistake is overwatering. Water deeply but infrequently—once a week in hot, dry weather is often plenty—and let the soil dry out completely between waterings.
- Organic Feeding: Moringa isn't a heavy feeder, but it appreciates good nutrition. I mix a generous amount of compost into the planting hole from the start. Then, I simply top-dress the soil around the tree with more compost once or twice a year. That’s usually all it needs.
- Companion Planting: Create a small ecosystem around your tree. Planting legumes, such as beans or cowpeas, nearby will fix nitrogen in the soil, acting as a natural fertilizer. Aromatic herbs like marigolds and basil can help deter common pests.
Pruning for Abundance: The Secret to a Bushy Harvest ✂️
Listen closely, because this is the most important advice I can give you. An unpruned moringa tree is a failed moringa tree from a home gardener's perspective. Its natural tendency is to shoot straight up, becoming a tall, scraggly tree that’s impossible to harvest. Aggressive and regular pruning is the key to transforming it into a dense, productive bush. Think of every cut as an encouragement for the tree to produce more.
Formative Pruning (The First Year)
These first cuts are critical for building the tree's long-term structure.
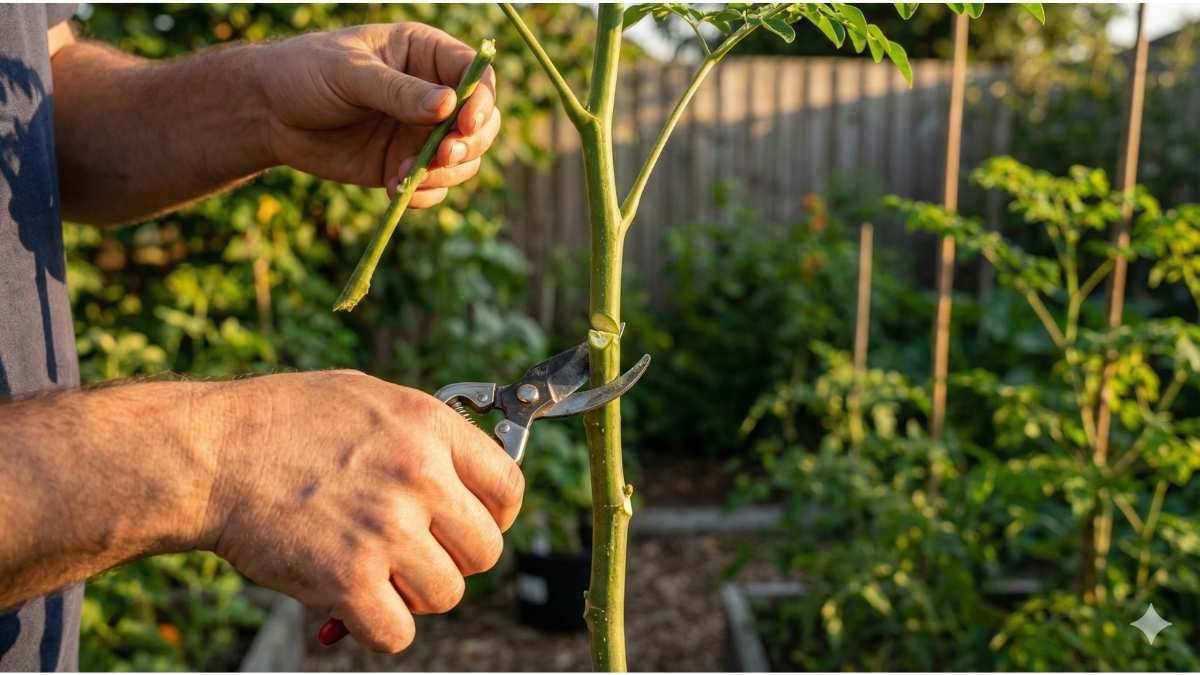
1. The First Cut (Topping): When your young sapling reaches about 3 feet tall, take a deep breath and cut the main central stem back to about 18-24 inches. I know it feels drastic, but this single cut is what stops the upward growth and forces the tree to branch out sideways.
2. Shaping the "Vase": After topping, several new branches will sprout. Select 4-5 of these that are well-spaced around the trunk to become your main "scaffold" branches and prune off the others. This creates an open, vase-like shape that improves airflow and sunlight penetration, keeping your tree healthy.
Maintenance Pruning (Ongoing)
Your pruning job is never done, but it becomes part of your harvesting routine.
- Annual Hard Pruning: In climates with a dormant season, the best practice is to cut the tree back hard once a year to a manageable height of 3-6 feet. This triggers a massive flush of new, tender growth in the spring.
- Harvest Pruning: Throughout the growing season, harvest by pruning. Instead of picking individual leaves, cut entire branches back by about 75% when they reach 2-3 feet long. The tree will respond by sending out multiple new shoots from the cut, multiplying your harvest.
| 🌱 Stage of Growth | 📏 Tree Height | ✂️ Pruning Action | 🎯 Goal |
|---|---|---|---|
| Sapling (First Year) | 3 ft (1 m) | Cut main trunk back to 18-24 in (50-60 cm). | Stop vertical growth; force lateral branching. |
| Young Tree (First Year) | N/A | Select 4-5 primary branches; remove others. | Establish an open "vase shape" framework. |
| Growing Season | Branches reach 2–3 ft | Continuously cut branches back by 75% during harvest. | Maintain compact size; stimulate new growth. |
| Mature Tree (Annual) | Any height | During dormancy, cut entire tree back to 3–6 ft (1–2 m). | Rejuvenate the tree for a large spring harvest. |
Reaping the Rewards: Harvesting Your Moringa 🧺
Harvesting can begin as soon as your tree is about 3 feet tall, and from my experience, this is one of the most rewarding parts of growing moringa because it’s a continuous cycle of give-and-take that keeps the tree healthy and productive.
Leaves: The Primary Harvest
The leaves are the most frequently harvested part of the tree, and how you harvest them depends on how you plan to use them.
- For Fresh Use: When you want leaves for a salad, smoothie, or to stir into a dish, it’s best to pick the youngest, most tender leaves.2 These have the mildest flavor. Here’s a pro tip I learned from my own kitchen experiments: to preserve their delicate nutrients, especially Vitamin C, add fresh leaves to cooked dishes like soups and stews just a few minutes before you take them off the heat.
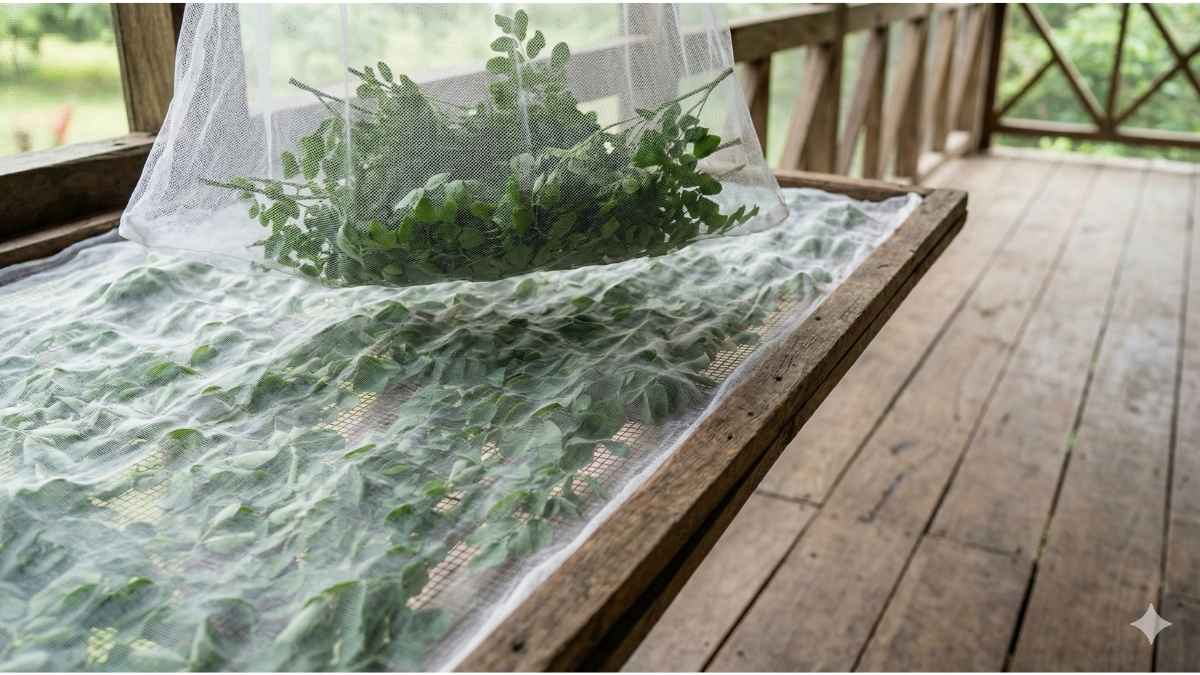
- For Drying and Powdering: This is where the "harvest by pruning" method truly shines. For a long-lasting supply of moringa powder, you'll harvest entire branches. After cutting, wash the branches thoroughly to remove any dust. Now comes the most critical step: the drying process. You must dry the leaves in the shade in a clean, dry, and well-ventilated area. Hanging the branches upside down or spreading them on mesh screens works perfectly, as it allows for good air circulation and prevents mold.
- Never dry them in direct sunlight. From my studies, I can tell you that the sun's UV radiation will significantly degrade the vitamin content, particularly vitamins A and C.2 Once the leaves are completely dry and brittle to the touch, they will strip easily from the stems. You can then crush or grind them into a fine, vibrant green powder. Store it in an airtight, opaque container away from light, and it will maintain its potency for up to six months.
 Nutrient Protection: Drying in the shade prevents UV radiation from destroying the vitamins you worked hard to grow.
Pods ("Drumsticks"): A Two-Fold Harvest
The long, slender seed pods, which give the tree its "Drumstick Tree" nickname, are a delicacy in many parts of the world and can be harvested for two different purposes.
- For Vegetable Use: Harvest the pods when they are still young, green, and tender—typically when they are about the thickness of a pencil (around 3/8" to 1/2" in diameter).4 At this stage, they can be snapped easily. They are a staple in South Asian cuisine, often parboiled and added to curries and stews.5 When cooked, the inner flesh has a unique and delicious taste, often described as a cross between asparagus and green beans.
- For Seed Collection: If you leave the pods on the tree, they will mature, becoming tough and woody before eventually turning brown and drying out.2 Once fully dry, the pods can be split open to harvest the mature seeds inside. These seeds can be saved for planting next season or eaten in moderation (they have a sharp, slightly bitter taste).
Flowers: The Fragrant Bonus
Don't overlook the beautiful flowers! Your tree can start producing fragrant, creamy-white blossoms in as little as nine months. They are completely edible and have a delicate, slightly sweet flavor reminiscent of mushrooms.8 You can harvest them and toss them fresh into salads, fry them, or add them to omelets and stir-fries.
One of my favorite ways to use them is to brew them into a delicate tea. In traditional medicine, the flower juice is even used to improve lactation in nursing mothers and the tea is used to help fight colds and infections, which speaks to the incredible utility of every part of this tree.
A Gardener's Secret Weapon: DIY Moringa Growth Stimulant ✨
Here’s a final tip that feels like a secret from my student farmer playbook. The moringa tree can actually feed your other plants. Its leaves contain a potent natural plant growth hormone called zeatin. A simple foliar spray made from its leaves can increase the yields of other crops by 20-35%.
Simple Recipe: Blend 1 cup of fresh, young moringa leaves with 1 liter of water. Strain the liquid through a cheesecloth, then dilute it with another liter of water. Add a single drop of natural soap (as a surfactant) and spray it on the foliage of your other garden plants every two weeks.
Your Journey Starts Now
Growing a productive moringa tree isn’t about luck; it’s about following a proven, practical plan. You are now empowered with the knowledge to do it right. By providing full sun, ensuring perfect drainage, and committing to an aggressive pruning strategy, you can transform a single seed into a resilient, low-maintenance, and endlessly giving source of nourishment. You have the blueprint. Go grow your miracle tree. ❤️
High-Value External Links
1. For an excellent visual guide on pruning techniques that create a vase shape, you can explore the resources here.
2. For more information on the plant's global significance and use in nutrition, visit here.

Meet Saqib
Saqib Ali Ateel is a PhD Scholar by training and a "student of the soil" by nature. He combines deep research, hands-on farming wisdom, and agricultural systems supervision to reveal what’s really on your plate. His mission is simple: to help your family navigate the food industry's complexity so you can eat cleaner, safer, and smarter.
- Home
- Moringa Benefits
- Moringa Seeds
- Buy Moringa Seeds
- Moringa Tree

